ROCKSOLID TIPS & TECHNIQUES
ROCKSOLID TIPS & TECHNIQUES
Garage Coat Application Tips & Techniques
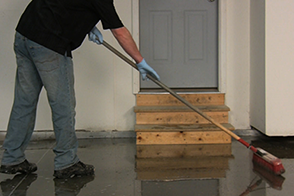 |
STEP 1 Concrete Preparation Scrub heavily - soiled areas with concrete etch (included) and rinse thoroughly and allow to dry completely. |
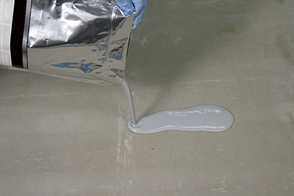 |
STEP 2 Mix, Shake and Pour Thoroughly mix the material in all pouches by shaking it and squeezing each side of the pouch. Combine the two components by placing the pouch on the ground and rolling it from the Part A side towards the Part B side. This will create pressure in the Part A side and force the middle seal to burst, allowing the two components to mix together. Thoroughly mix the materials by shaking the pouch back and forth and squeezing the edges and corners towards the center of the pouch for 2-3 minutes. Pour the mixed material from the pouch on the floor about a foot from the back corner wall in roughly 1.2-1.5m ribbons at least 50-76mm wide. Cut in the edges with a paint brush.
|
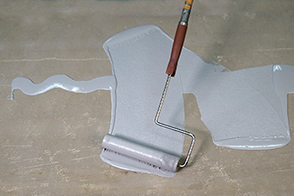 |
STEP 3 Roll Out Once a small amount of the Garage Coat is poured onto a section of floor, use the foam roller (included) to roll it out in an "M and W" pattern working in 1.2 x 1.2m sections. Continue working in 1.2 x 1.2m sections pouring a new ribbon .7m away from previous section. Use the roller to pull the material back first, then it can be pushed forward to fill in the void between sections. Overlap into previously coated areas while taking care to avoid creating thick spots. |
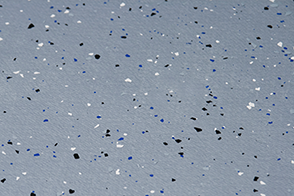 |
STEP 4 Broadcast Once a strip across the entire back wall has been coated, toss decorative paint chips onto the wet coating. Leave a 150 – 305mm section of wet film without decorative chip. This section will be rolled into when coating the next 1.2m x 1.2m area. Skip this step if paint chips are not desired—it will not affect coating performance. |